How to run fast.ai course notebooks using Google Colaboratory
fast.ai offers hands-on courses on Machine Learning and Deep Learning. Jeremy and Rachel (Course Professors), approach is “code first” rather than “math first”. The Machine Learning course is relatively new(launched on 26 Sep 2018), compared to the Deep Learning track(launched on 24 Dec 2016).
This course uses modern tools and libraries, including python, pandas, scikit-learn, and pytorch.
You would need to setup Jupyter Notebook environment to try the hands-on course material.
Setup Jupyter Notebook
Below are some of the options to setup Jupyter Notebook:1) Create an AWS Instance
2) Setup Jupyter Notebook on your computer.
You would need a Laptop with NVIDEA GPU. But this is not a trivial task as you need to install the entire NVIDEA stack. Also need to ensure version compatibility with machine learning libraries. So this is not an option for a novice.
3) Use a Jupyter environment in Cloud.
Setup Jupyter Notebook in Cloud
Here are some of the options for a Jupyter Notebook in Cloud.a) Crestle.com
You just need to Sign Up and turn off "Enable GPU" radio button. But Crestle is not free. Crestle provides "1 hour of GPU and CPU usage and 1 GB storage free".Most of the data sets are preinstalled.
b) Paperspace
They have fastai template preinstalled. Basically you can get a fully-configured env in few seconds. As per the site this is a fully-managed enterprise GPU cloud platform. they also provide a serverless infra for Machine Learning and AI. You don't need to spin up a VM. This is a paid service like Crestle.
c) FloydHub
Another Deep Learning Platform - Cloud GPU, but not free.
d) Google Colaboratory
Google Colaboratory is free and provides limited access to GPU / TPU. Free for 12 hours at a time.
As per this article, Paperspace is the most affordable paid option as of now.
Steps to run course notebook using Google Colaboratory
After doing a comparative study, I have decided to use Google Colaboratory. Google Colaboratory is free and provides free GPU also. But note that you won't get a dedicated Virtual Machine for more than 12 hours.This is to make sure that the platform won't be used for long-running background computations like cryptocurrency mining.You would need to repeat the setup steps. Because the Colab VM may reset if the session is idle for 90 minutes or more. Also there is a risk of VM reset after 12 hours. But redoing the setup for this course doesn't take much time (less than 10 minutes). The Notebooks are saved to Google Drive by default.But if you copy/modify some other stuff, make sure to back them up them to Google Cloud Storage before disconnecting from the Colab VM instance.
Overview
Official fastai course notebook has instructions to run the commands using Papersace jupyter environment.Please refer my notebook below for instructions to run the lesson notebook using Google Colaboratory.
https://github.com/rajivkuriakose/fastai_ml/blob/master/fastai_ml_lesson_1_v3.ipynb
- SignUp for Google Colaboratory account.
- SignUp for Kaggle account.
- Kaggle data sets are used for the assignments.So this pre-requisite is required to download the data set using kaggle cli.
- Connect to Google Colaboratory
- Open a new Python 3.6 Notebook. And change Runtime to "GPU"
- Most of the Python packages required for data science projects are preinstalled in Google Colaboratory. Need to install some additional packages(PyTorch, torchvision, fastai deep learning library etc.) required for fast.ai course.
- Generate Kaggle API token.
- install kaggle cli
- Download data set using kaggle cli.
- start running the commands from Lesson 1 assignment Notebook!
Detailed steps to run Course Notebook on Google Colaboratory
Go to Runtime > Change Runtime Type
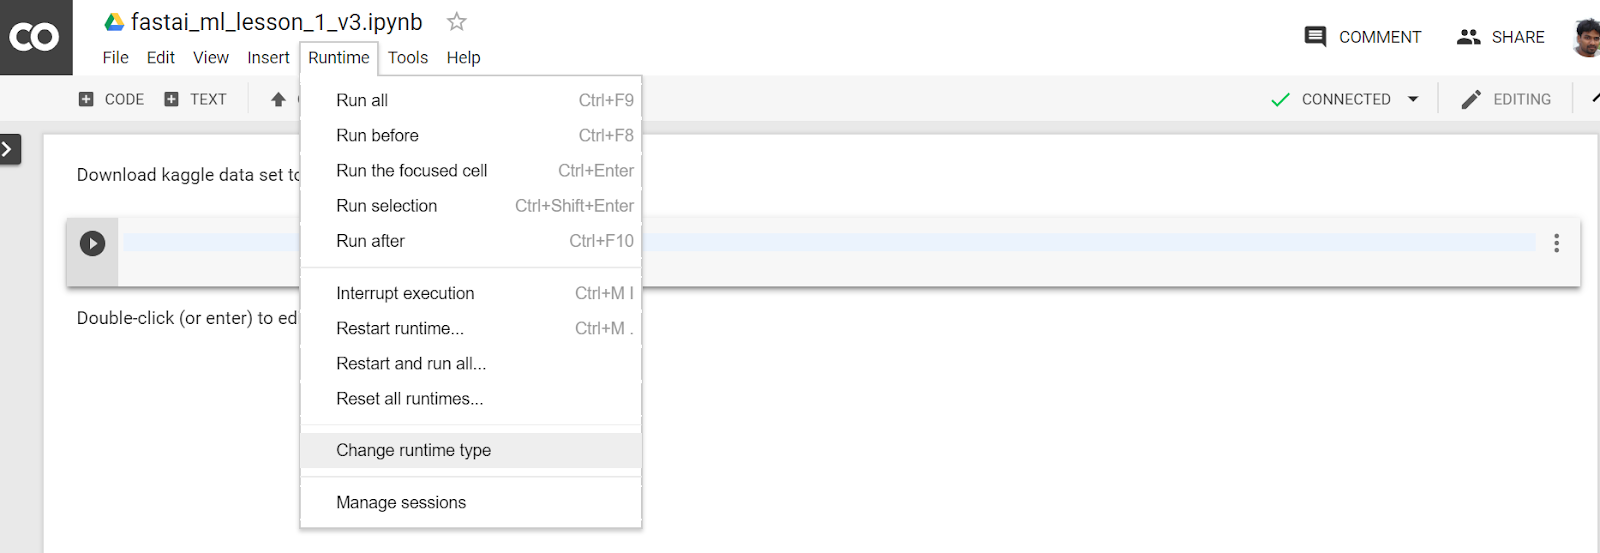
And select Runtime Type as “Python 3” and select GPU from “Hardware accelerator” dropdown. And click Save.

Run below command in Notebook to confirm GPU is enabled.

Install kaggle cli

Generate Kaggle API Key
Install kaggle cli
Generate Kaggle API Key
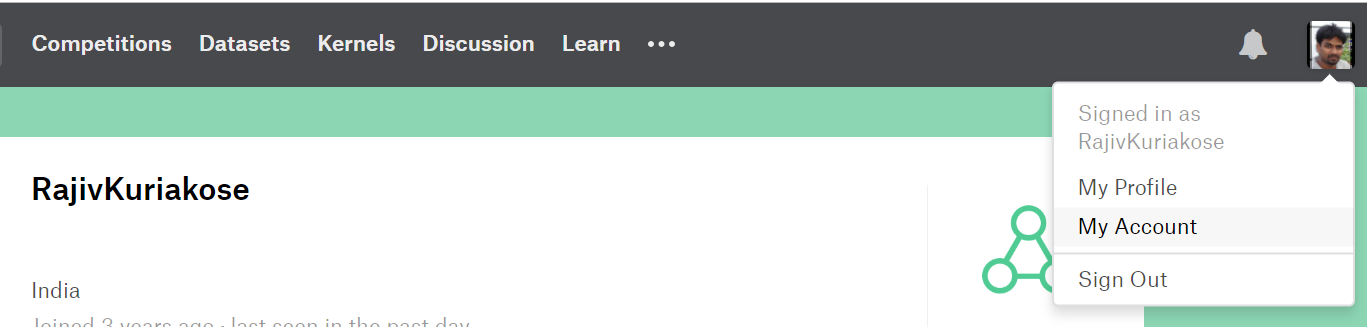
Login to Kaggle. Click on My Account link(Top Right corner).
Scroll down to API section. And click “Create New API Token” button.
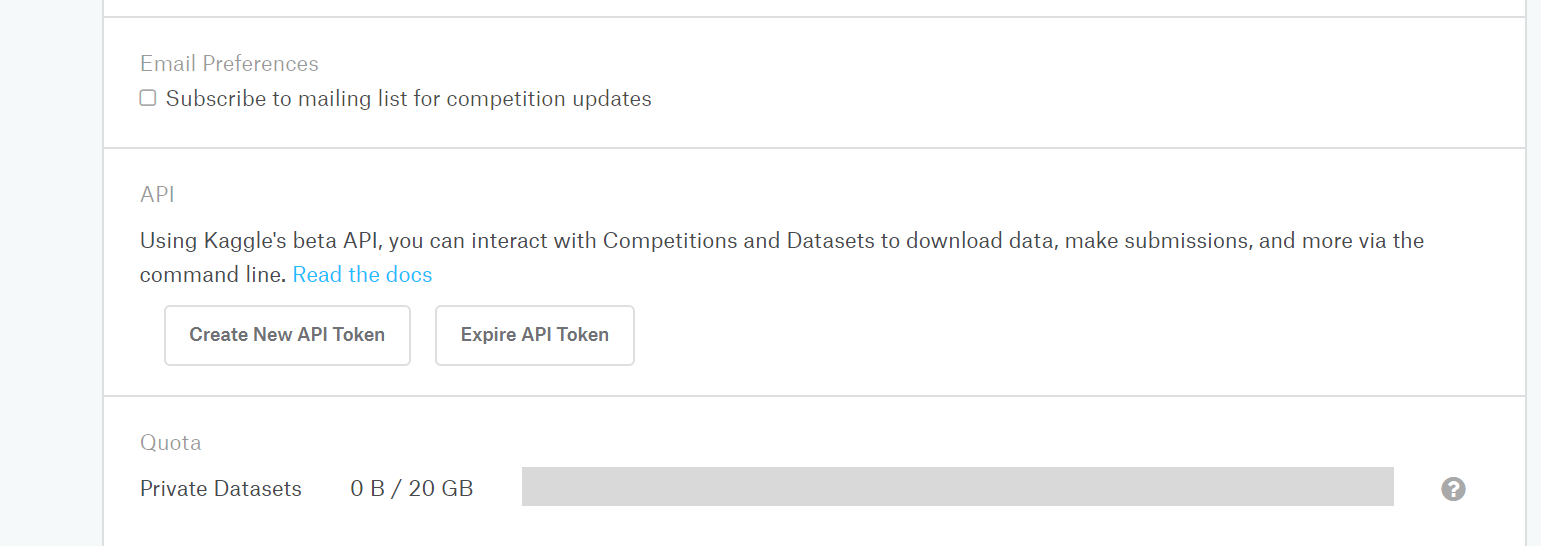

The kaggle.json file is downloaded.
As per above link, need to upload the kaggle.json to Google Drive. I have uploaded kaggle.json under the Drive's root folder.
This file contains two parameters. “username” and “key”.
Download kaggle API key to Colaboratory VM instance

Open the link in another tab and login to Google Account. After successful authentication, the UI will show a verification code. Copy the verification code and paste it in the text field shown in above output(“Enter verification code” : )
Now the kaggle.json file is copied to the Colaboratory VM.
Now go to the competition home page and copy the "kaggle datasets download" command displayed in the UI. And run this from Notebook.
!kaggle datasets download -d farhanreynaldo/blue-book-for-bulldozer
Now follow the commands in the official fastai course notebook.
Please refer my notebook below for end-to-end steps to run the lesson on Google Colaboratory.
https://github.com/rajivkuriakose/fastai_ml/blob/master/fastai_ml_lesson_1_v3.ipynb
Lesson 1 Resources
Lesson 1—introduction to random forestsLesson wiki
Course Forum wiki thread
Kaggle Data Set for Lesson 1
https://towardsdatascience.com/fast-ai-lesson-1-on-google-colab-free-gpu-d2af89f53604


No comments:
Post a Comment